
Most websites keep their content in a MySQL database: pages, posts, products, orders and users. WordPress too. In DirectAdmin, you create a database in a minute. With phpMyAdmin, you look inside it, and import or export it.
You can create as many databases as you need.
Installing WordPress with Softaculous? Then you can skip this guide. Softaculous creates the database for you. Read how to install WordPress with Softaculous.
Before you start
To open DirectAdmin, go to Dashboard, select your plan, and open Web hosting. Then click Log in automatically. Read more about logging into DirectAdmin.
Create a MySQL database
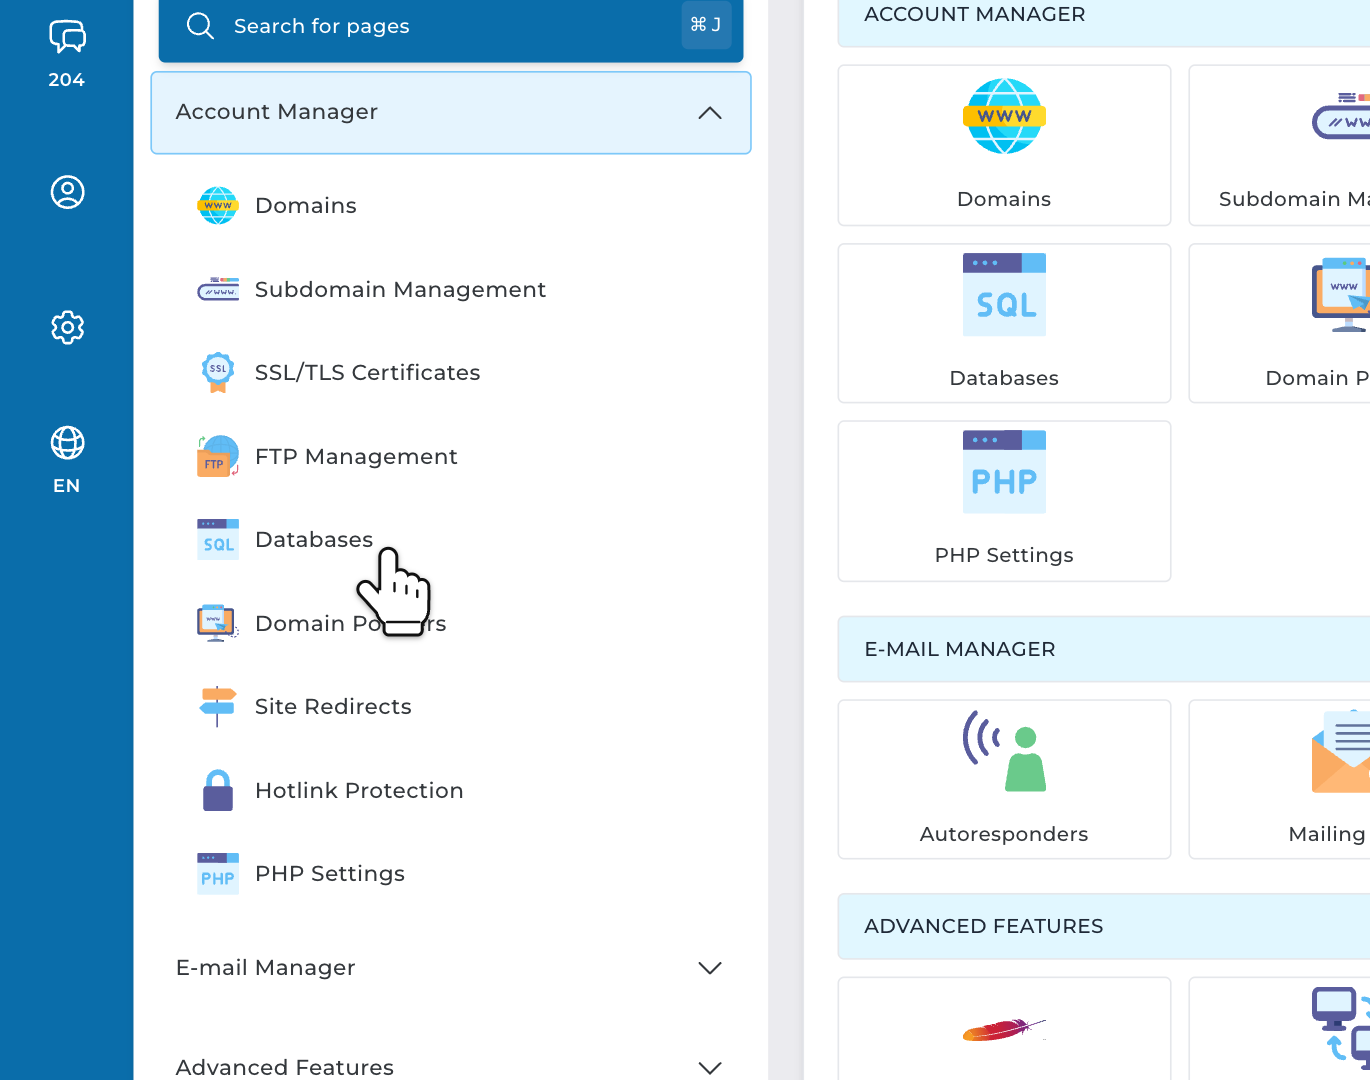
Step 1: In DirectAdmin, open Account Manager in the menu. Click Databases.
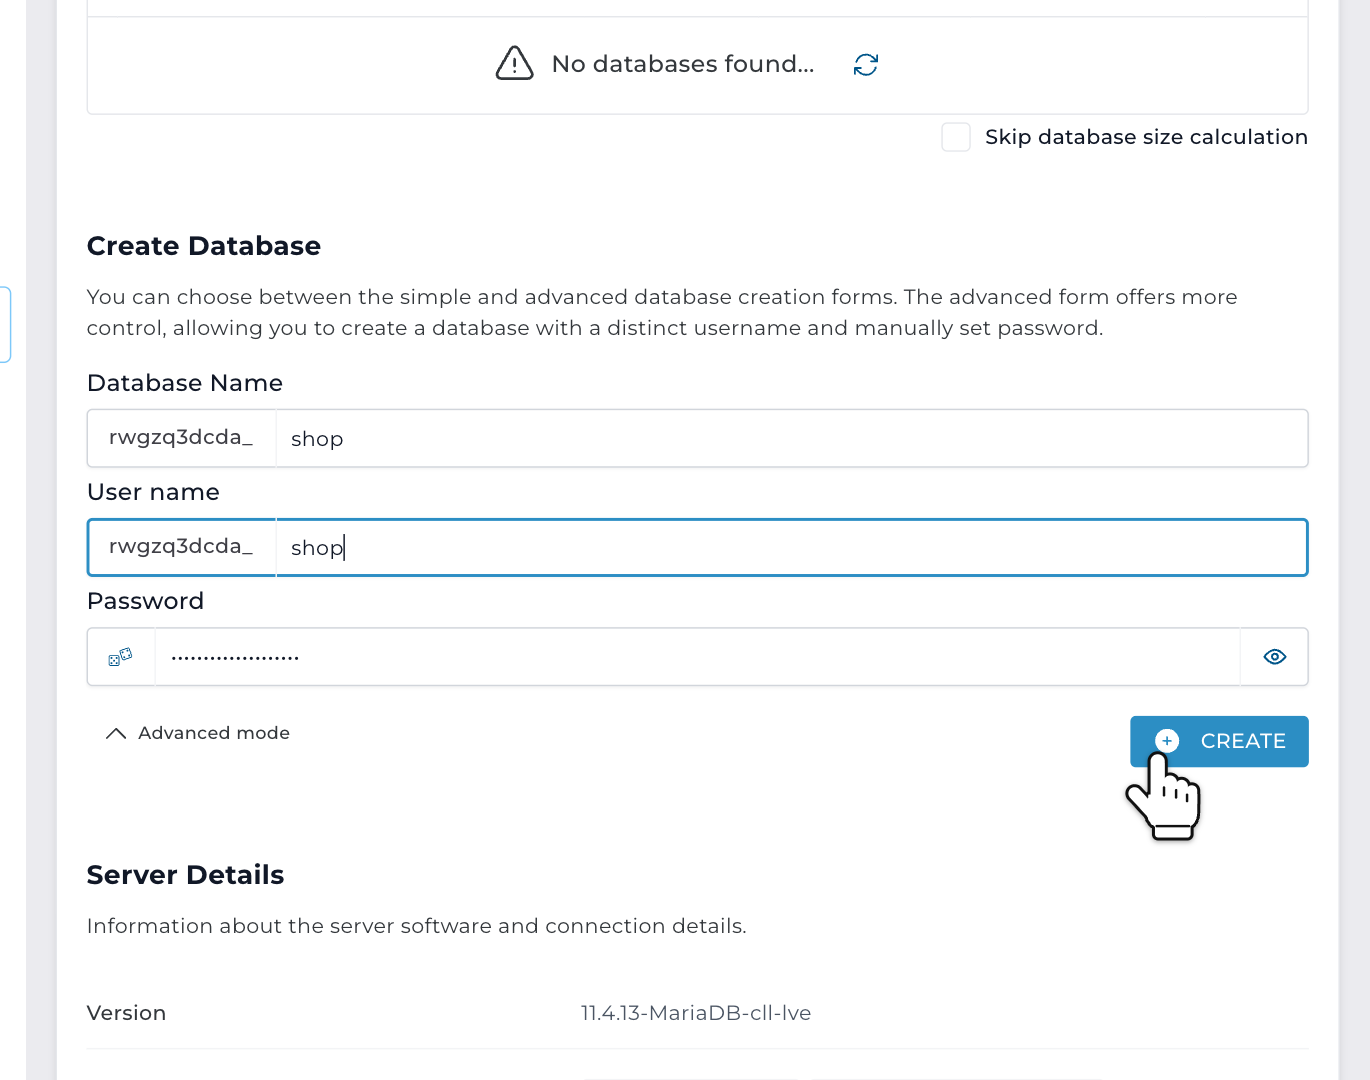
Step 2: Scroll down to Create Database and click Advanced mode. Then fill in:
- Database Name: a short name, such as shop.
- User name: the user your website logs in with. The same name as the database is fine.
- Password: DirectAdmin already made a strong one. Keep it, or click the dice for a new one.
DirectAdmin puts your DirectAdmin username and an underscore in front of both names. So shop becomes username_shop. Click CREATE.
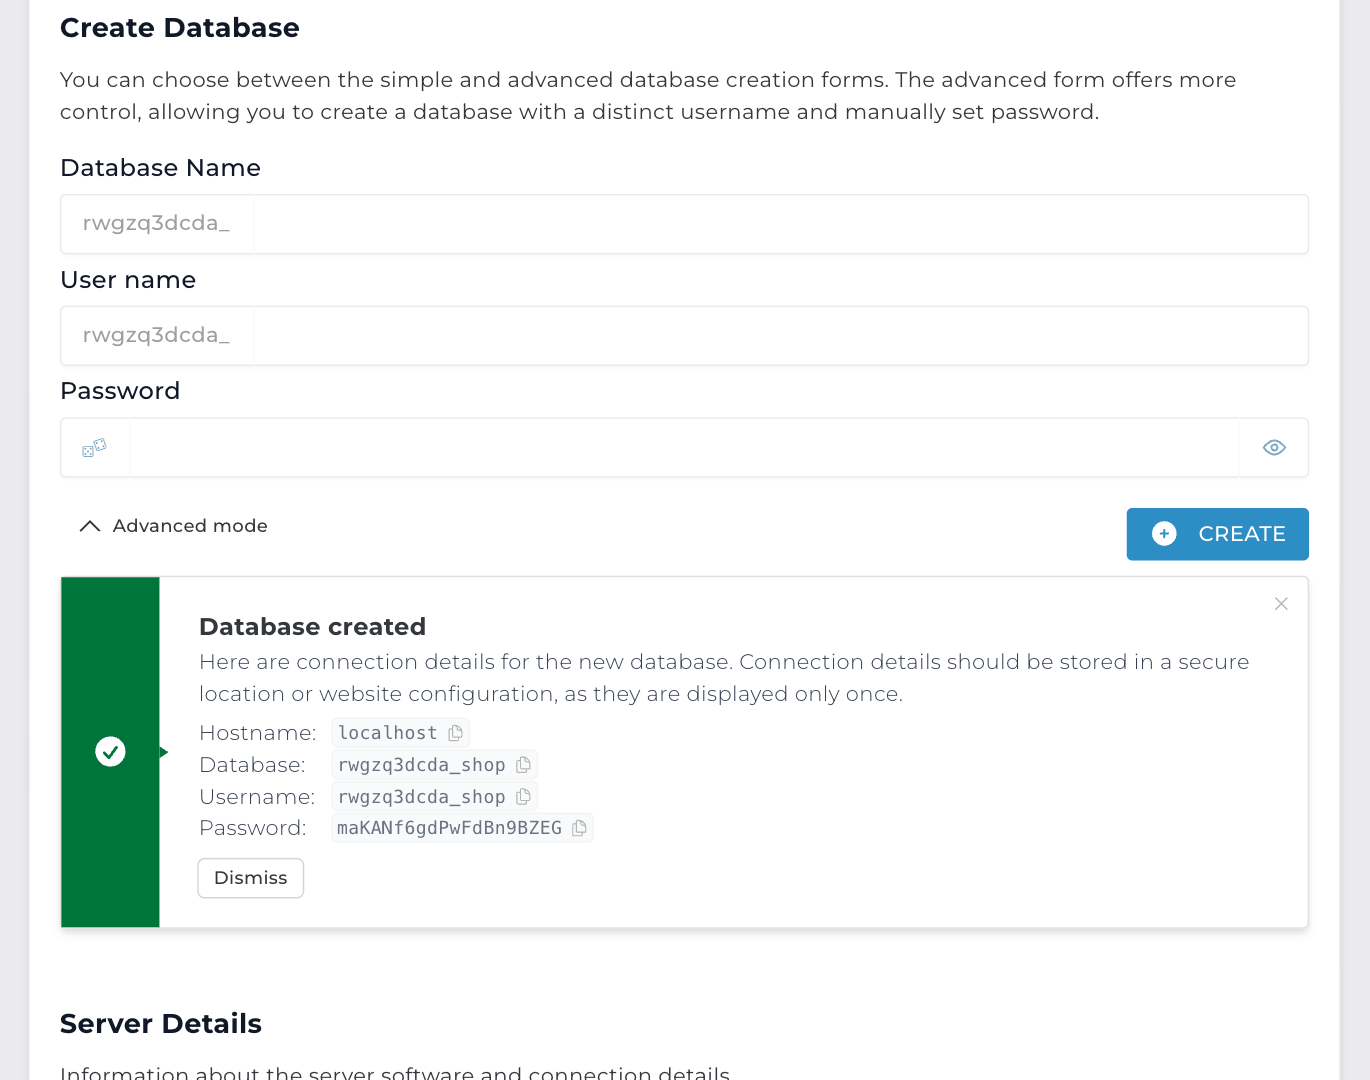
Step 3: Under Database created, you see the details of your new database. Save them right away, for example in a password manager. You see the password only once.
Rather keep it simple? Then skip Advanced mode. Type only the database name and click CREATE. DirectAdmin then makes a user with the same name and a strong password.
The details your website needs
Your website connects to its database with four details. You find them under Database created:
- Database name: with your username in front, such as username_shop
- Username: such as username_shop
- Password: the one you saved in step 3
- Host: localhost
Where do they go? That depends on your website. WordPress keeps them in wp-config.php, in the folder of your website:
define( 'DB_NAME', 'username_shop' );
define( 'DB_USER', 'username_shop' );
define( 'DB_PASSWORD', 'your password' );
define( 'DB_HOST', 'localhost' );
WordPress says Error establishing a database connection? Then one of these four details is wrong. Check the username in front of the names first.
Open phpMyAdmin
phpMyAdmin shows what's in your databases. You can look at tables, search, and import or export a database.
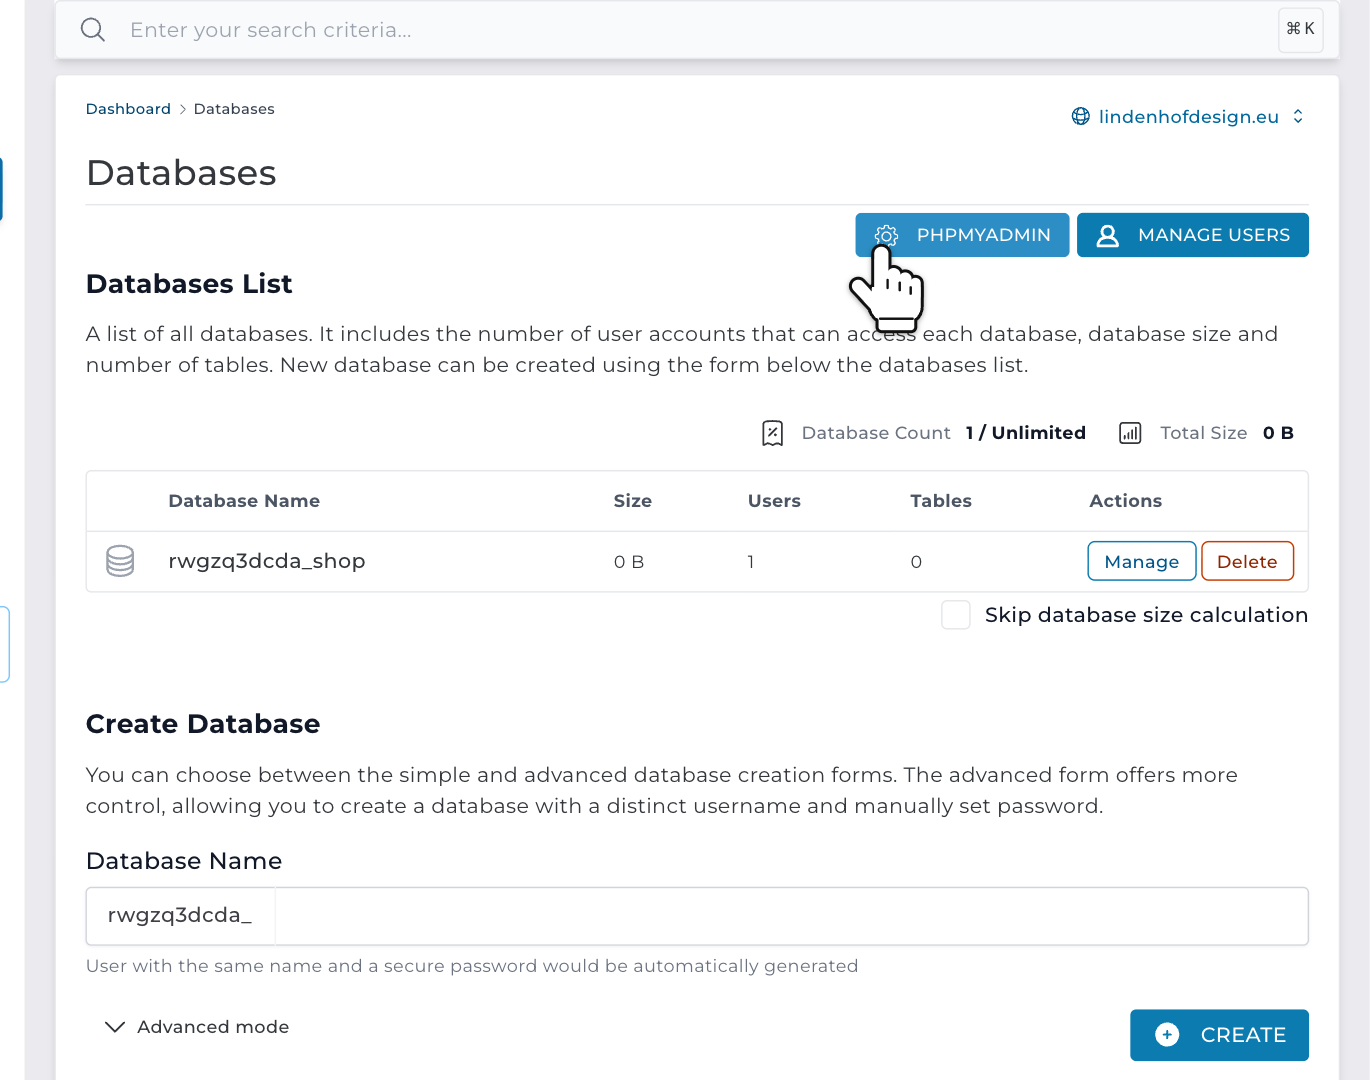
Step 4: On the Databases page, click PHPMYADMIN at the top. phpMyAdmin opens in a new tab, and you're logged in right away. You can also open it from the menu: Extra Features and then phpMyAdmin.
Import a .sql file
Got a database export from another host, or a backup? Then put it into your new, empty database.
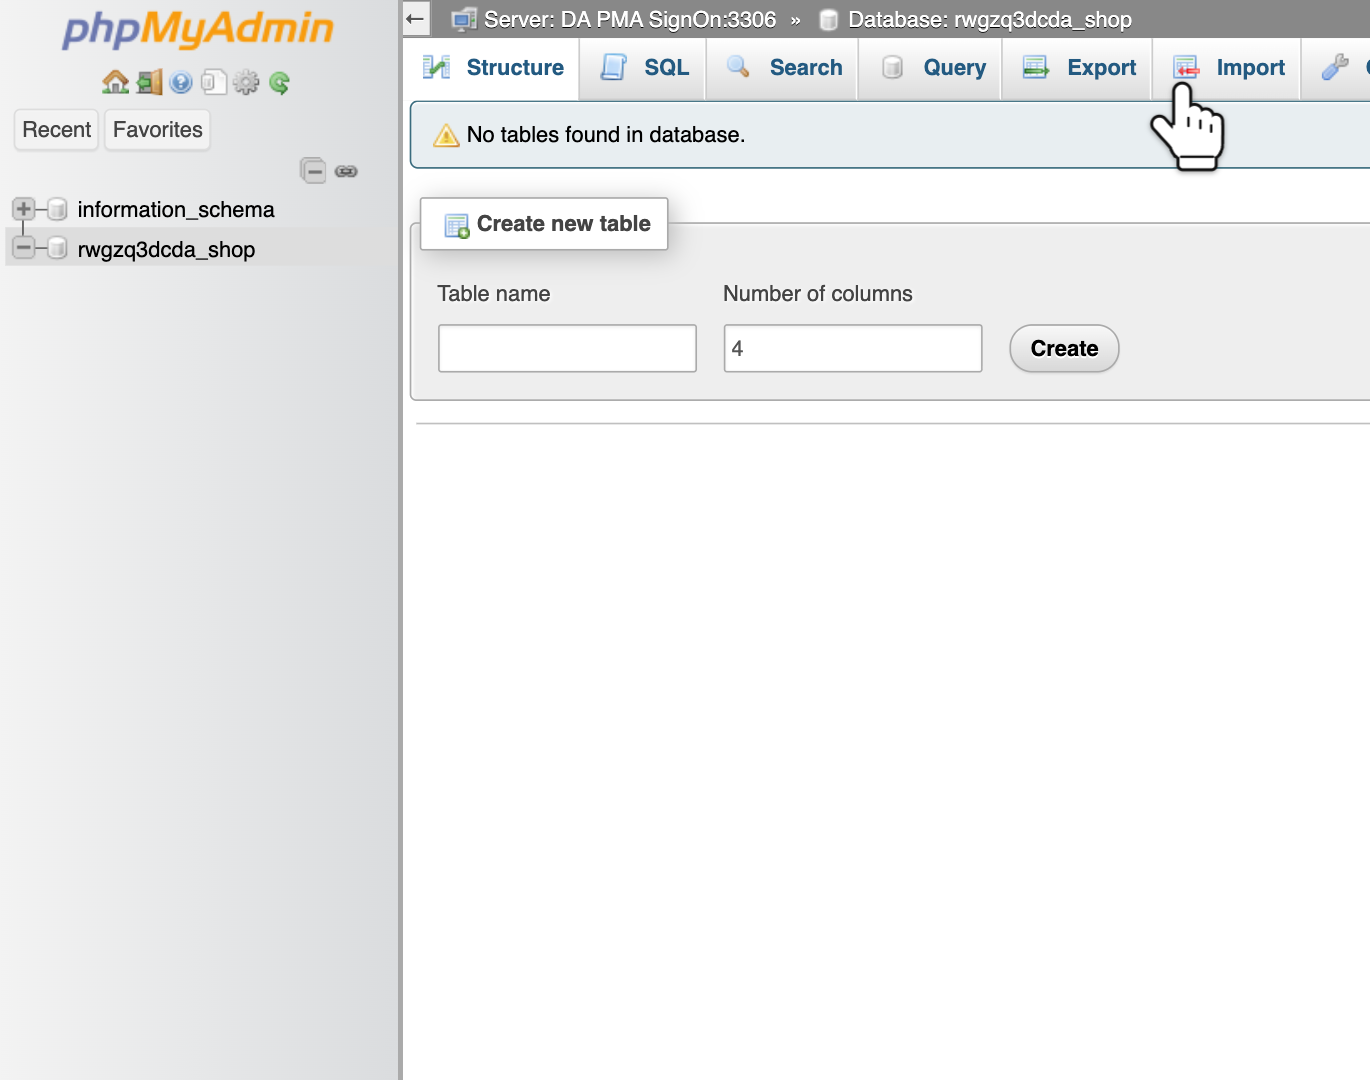
Step 5: In phpMyAdmin, click your database on the left. Then click Import at the top.
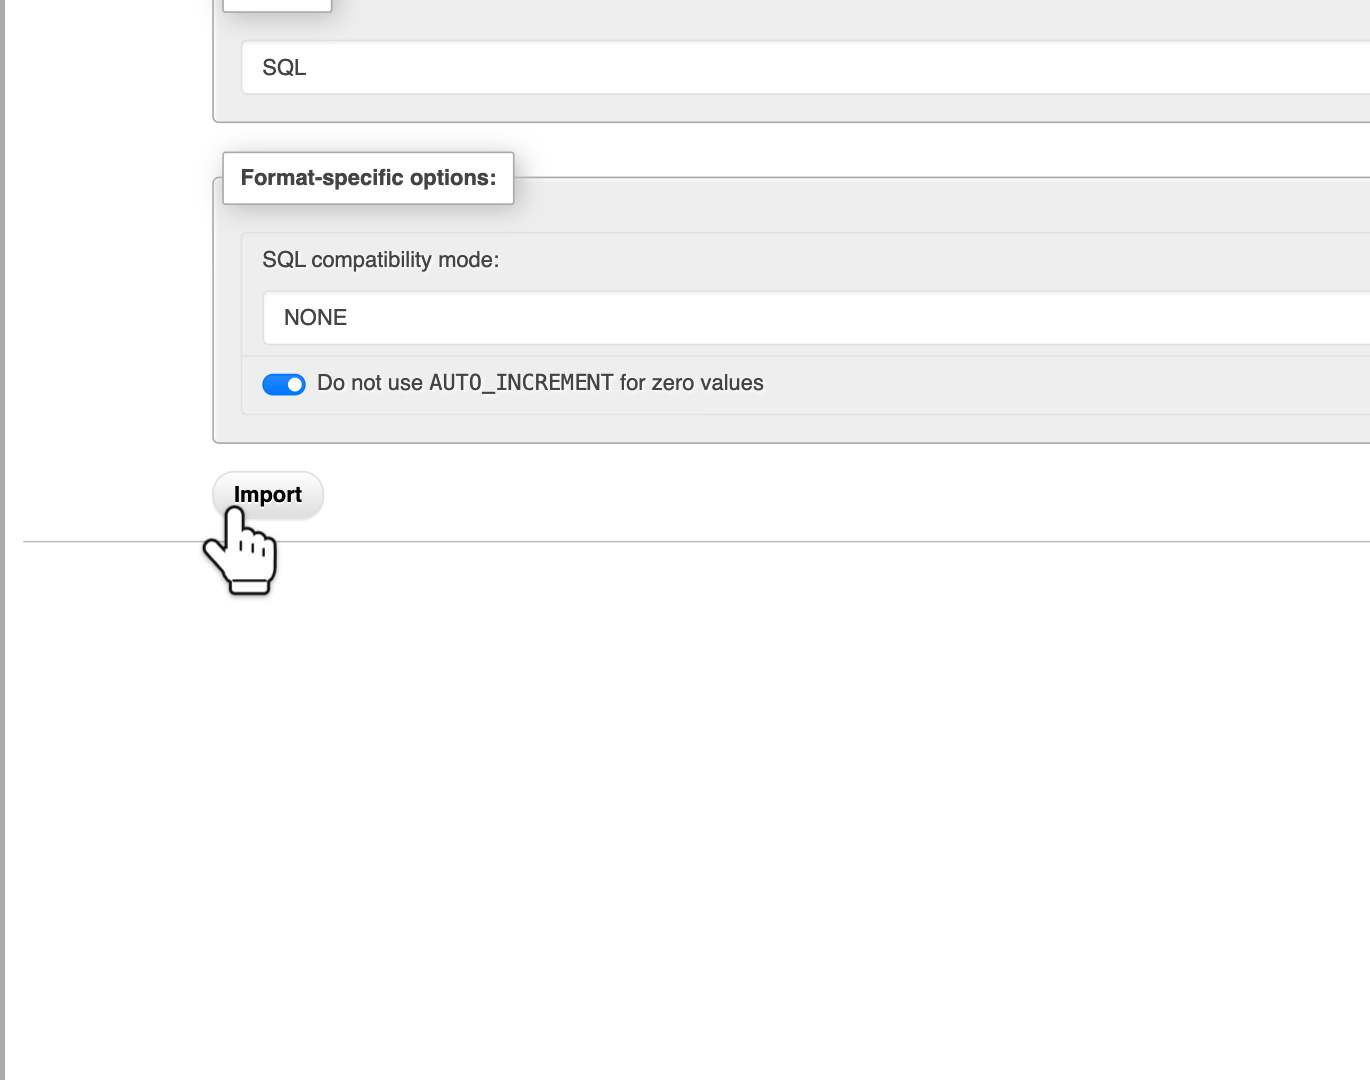
Step 6: Under File to import, next to Browse your computer, choose your .sql file. Leave the other options as they are. Scroll down and click Import. When it's done, you see your tables on the left.
Next to Browse your computer, phpMyAdmin shows the largest file you can import. Is your file bigger? Compress it first, so it ends in .sql.gz or .sql.zip. phpMyAdmin reads those too. Still too big? Contact us.
Export a database
In phpMyAdmin, click your database on the left and click Export at the top. Leave Quick and the format SQL as they are, and click Export. The .sql file downloads to your computer. Keep it somewhere safe.
Moving your whole website to us? Then you also need to copy your files and change your settings. Read how to migrate a website.
Change the password of a database user
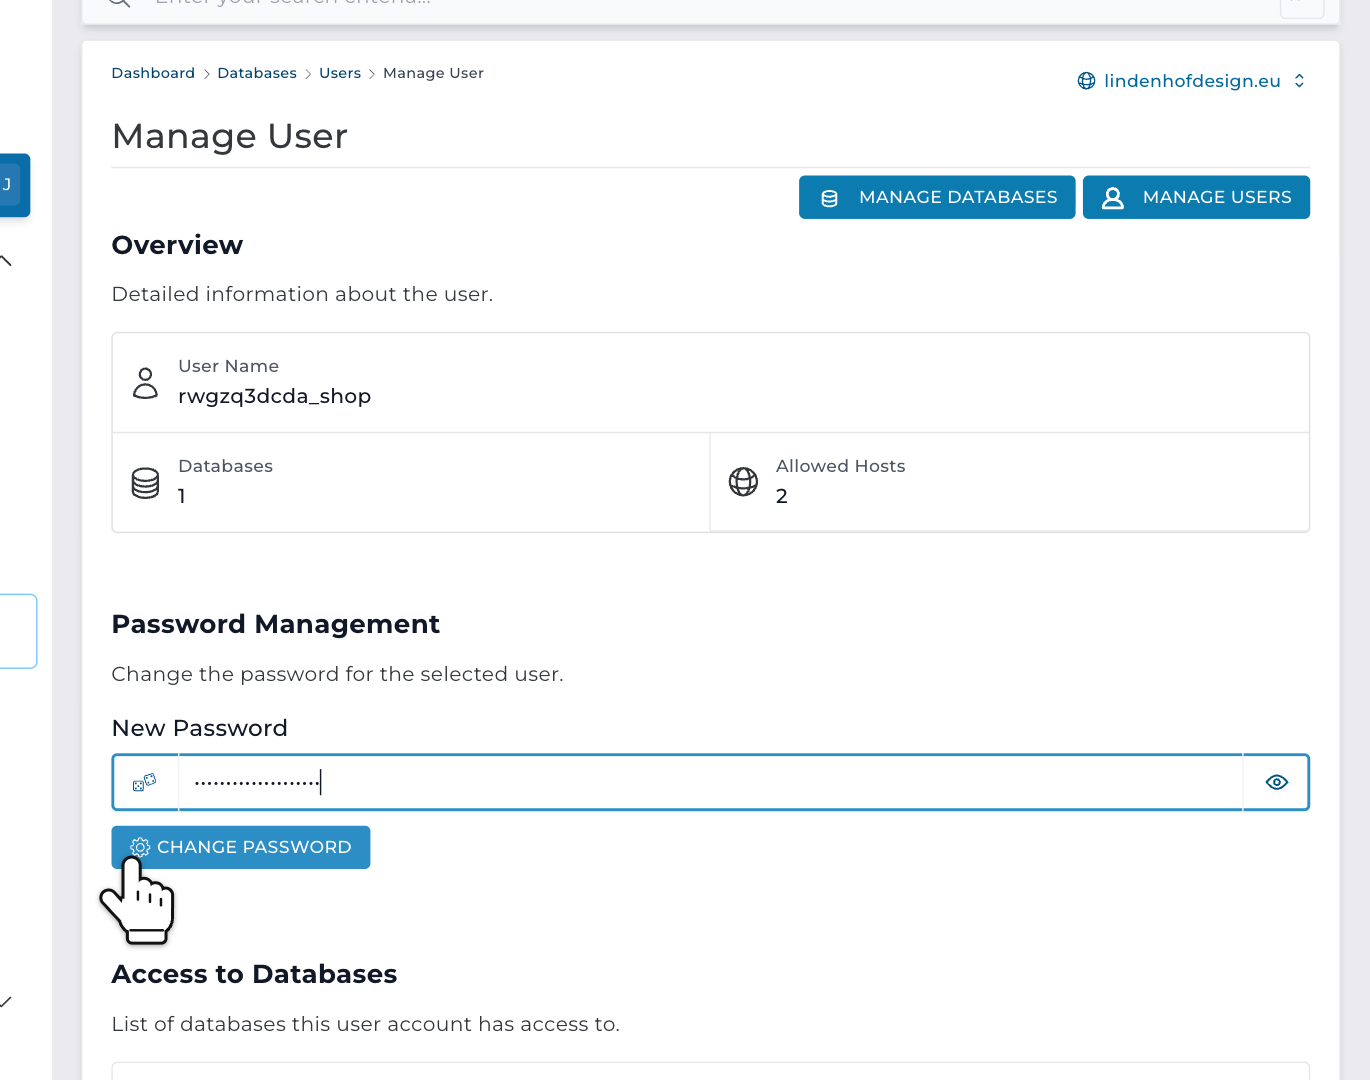
Step 7: On the Databases page, click MANAGE USERS. Next to the user, click Manage. Under Password Management, type a new password. Or click the dice in front of the field, and DirectAdmin makes a strong one. Then click CHANGE PASSWORD.
Right away, put the new password in the settings of your website too, such as wp-config.php. Until you do, your website can't reach its database.
Delete a database
Deleting a database removes all its tables and data. You can't undo it. Not 100% sure? Export it first.
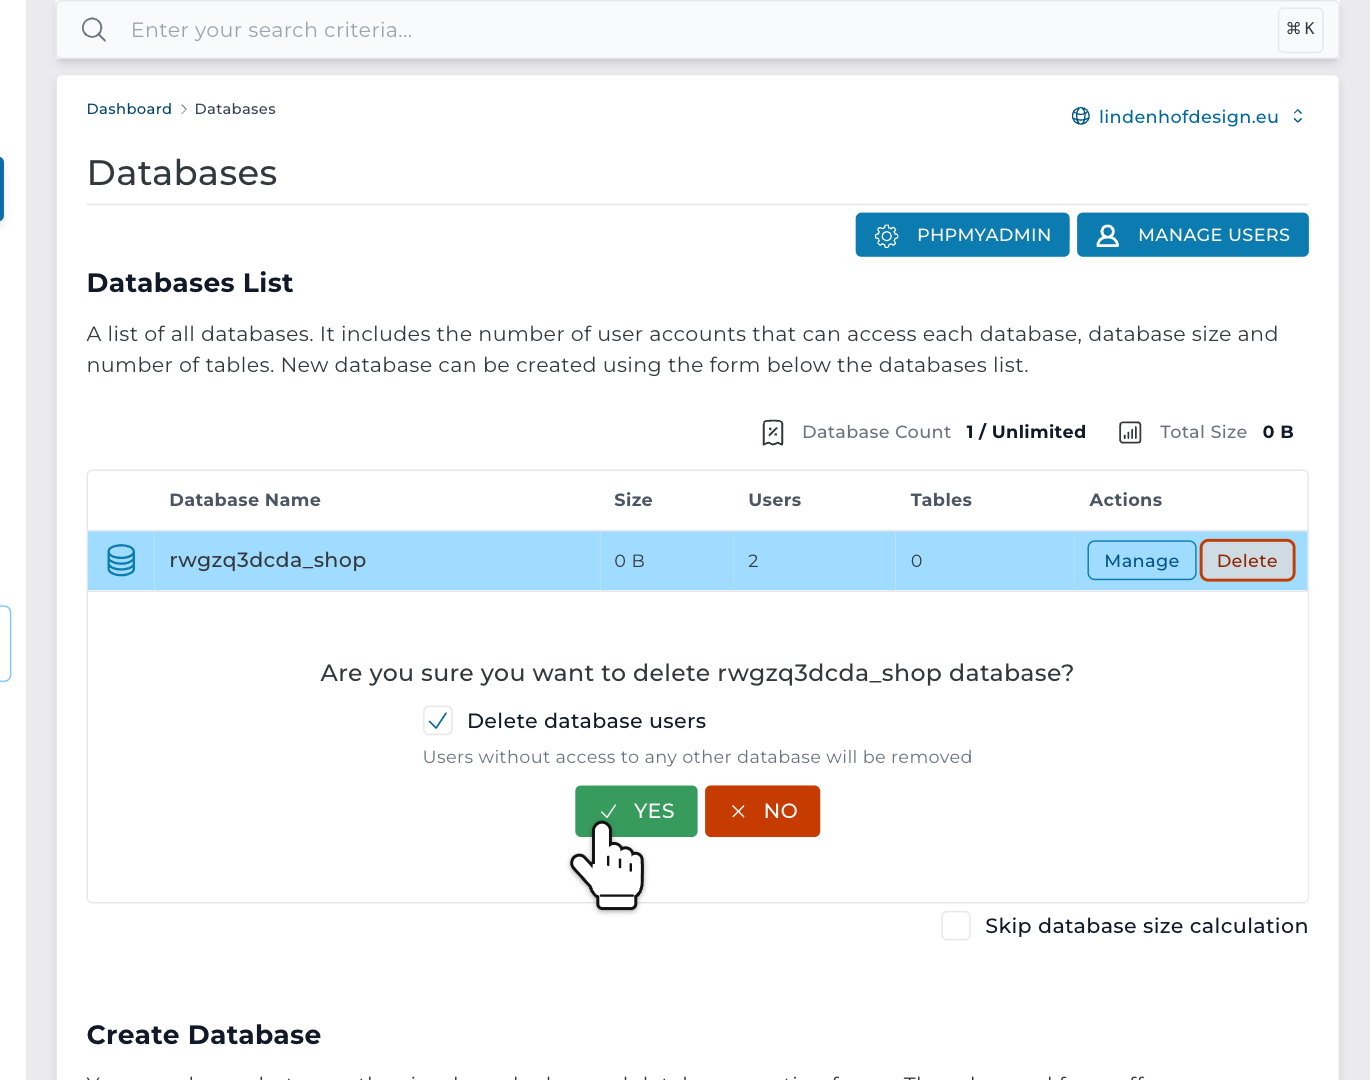
Step 8: On the Databases page, click Delete next to the database. Leave Delete database users ticked. It removes the user too, unless that user also has access to another database. Then click YES.