

Want Cloudflare in front of your website? It can make your website faster and protect it against attacks. You can use it with a domain name that's registered at Site.eu. Your web hosting and email stay with us. Only your DNS moves to Cloudflare.
This guide is for a domain name with our web hosting, our email, or both. Follow the steps in this order. Skip one, and your website or email can stop working.
What changes when your DNS is at Cloudflare?
- You manage your DNS records at Cloudflare. Not in your dashboard anymore.
- We no longer add records for you. Do you turn on a new service, or does your web hosting move to another server? Then you change the records at Cloudflare yourself.
- Your domain name stays with us. You renew it in your dashboard, as before.
- Redirects from your dashboard stop. We remove them when you turn off our DNS management. Set them up again at Cloudflare or on your website.
Before you start
Turn off DNSSEC, and wait 2 days
With our DNS, DNSSEC is usually on. Turn it off first. Cloudflare asks for that too. Change your nameservers while DNSSEC is on, and your domain name can become unreachable.
Ask the Site Assistant: Turn off DNSSEC for yourdomain.com. It asks for your support PIN first. Read how to manage DNSSEC to see if it's on.
Then wait 2 days. DNS servers keep the old DNSSEC data for a while, often 24 to 48 hours. Is DNSSEC already off, for example because your extension doesn't support it? Then you can go on right away.
Get your SSL certificate first
Your website keeps using our SSL certificate, also behind Cloudflare. Request it now, while your domain name still points straight to us. Choose your domain name and www. Read how to activate SSL in DirectAdmin.
Export your DNS records
Step 1: Log in to your dashboard and open your domain name. Click Domain settings, then Advanced settings.
Step 2: Turn off Use default Site.eu settings and click Yes, proceed. Your DNS records stay as they are.
Step 3: Click Import/export DNS zone.
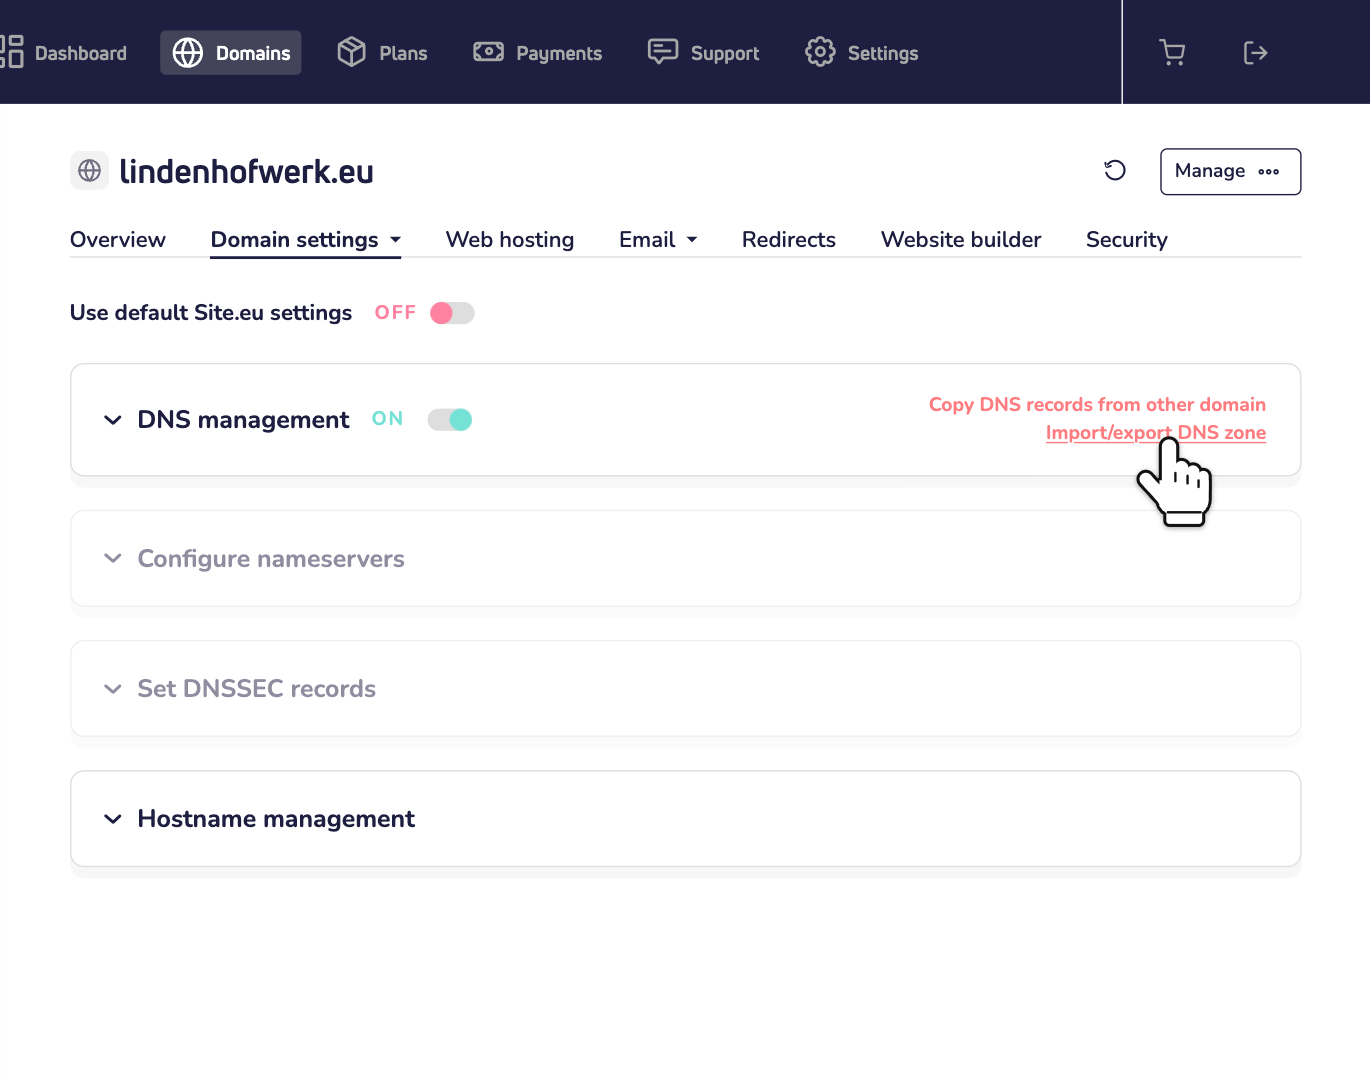
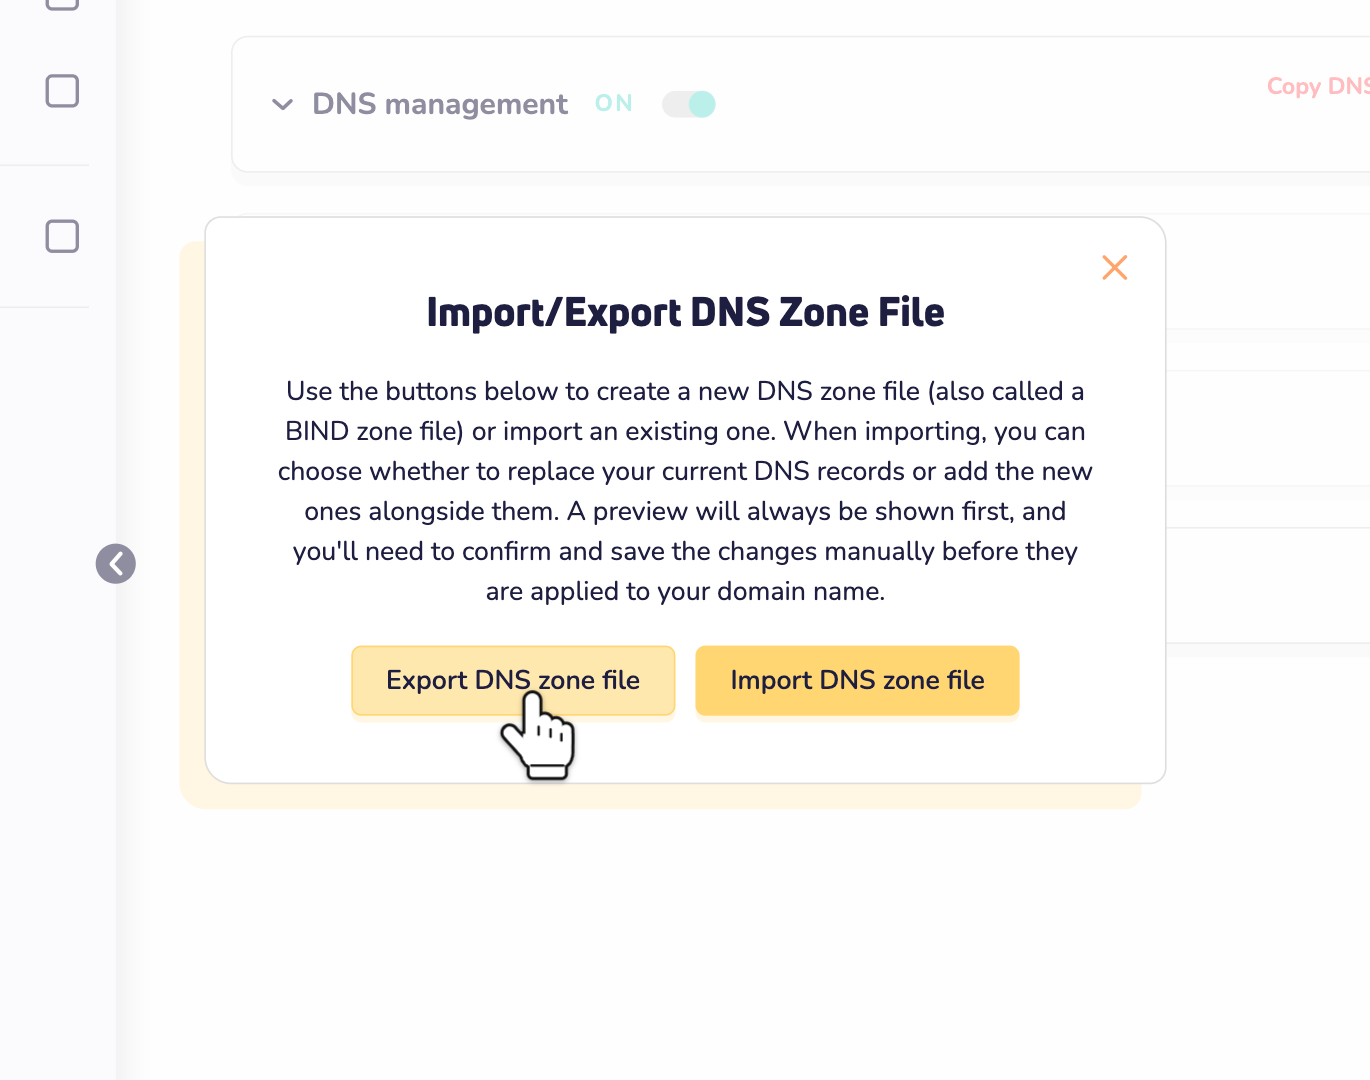
Step 4: Click Export DNS zone file. You get a file with all your DNS records, for example yourdomain.com.zone. You need it at Cloudflare.
Add your domain name to Cloudflare
Step 5: Log in to Cloudflare and add your domain name. Cloudflare calls this onboarding a domain. Pick a plan, for example the free one.
Step 6: Cloudflare can scan your DNS records, but the scan can miss some. So import your file too. On the DNS Records page, choose Import and Export and pick the file from step 4. Untick Proxy imported DNS records. You choose which records to proxy in step 7.
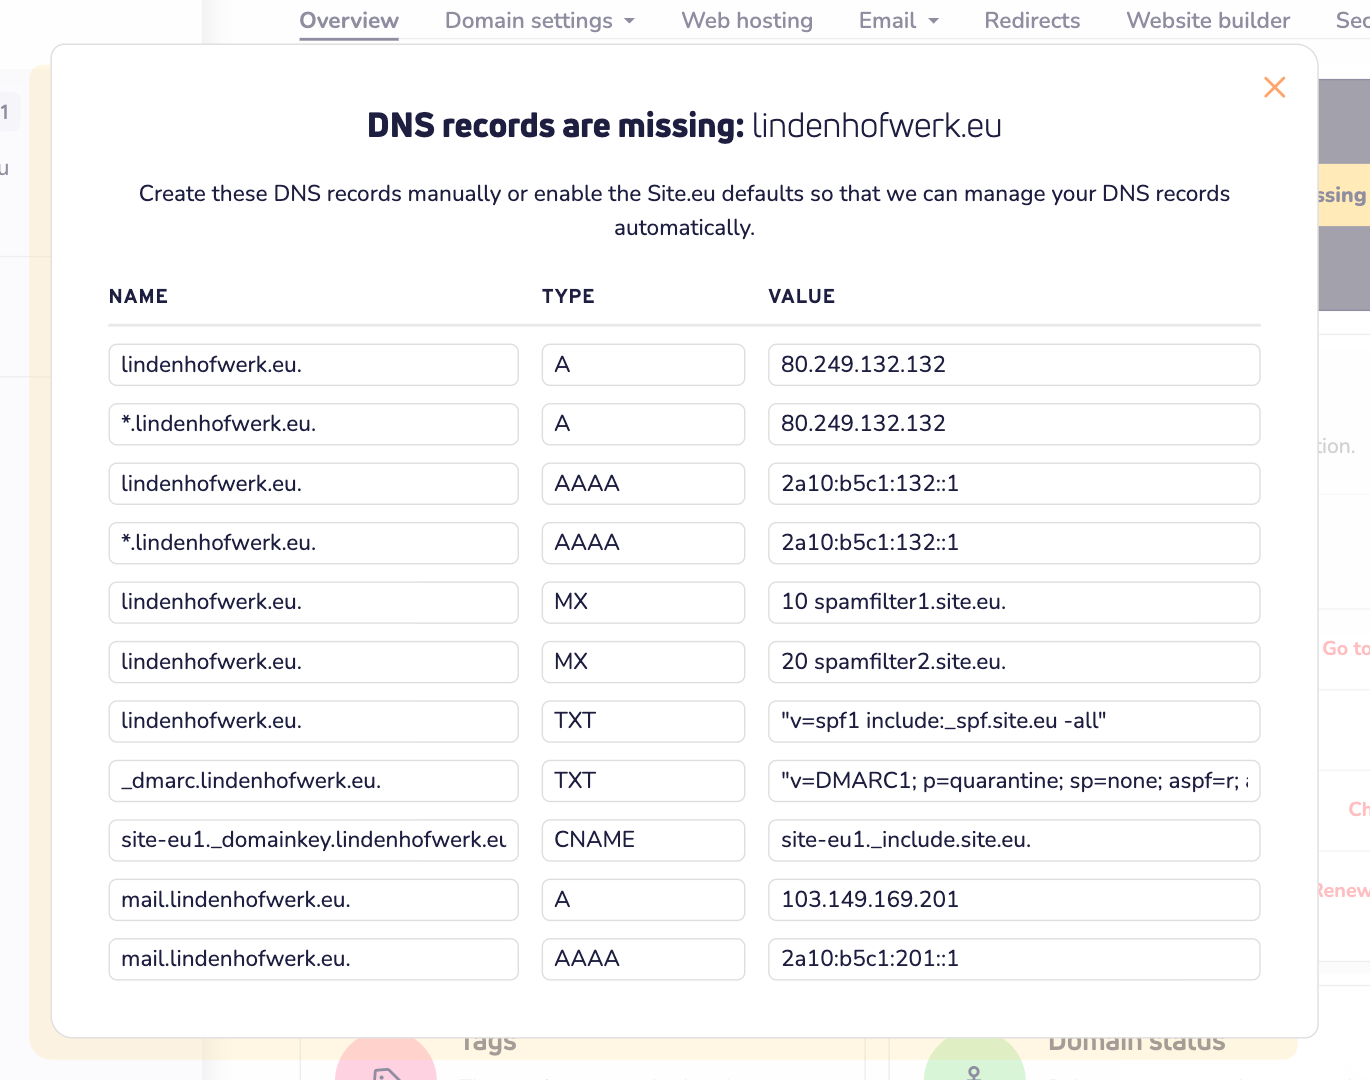
Step 7: Check the records at Cloudflare. Each record from the list below must be there, once. Then set the proxy status of each record, as explained below.
The DNS records our services need
Your file has the exact values. Here, yourdomain.com stands for your domain name.
For web hosting:
- A and AAAA for yourdomain.com: the IPv4 and IPv6 address of your web hosting server.
- A and AAAA for *: the same addresses. This wildcard also covers www.
For email:
- MX for yourdomain.com: 10 spamfilter1.site.eu and 20 spamfilter2.site.eu.
- A and AAAA for mail: the IPv4 and IPv6 address of your mail server.
- TXT for yourdomain.com: your SPF record, v=spf1 include:_spf.site.eu -all.
- CNAME for site-eu1._domainkey: your DKIM record, site-eu1._include.site.eu.
- TXT for _dmarc: your DMARC record, starting with v=DMARC1.
Proxied or DNS only?
For A, AAAA and CNAME records, Cloudflare asks: Proxied or DNS only? Proxied sends your visitors through Cloudflare. DNS only just gives out the address.
- Proxied: only the A and AAAA records of your website, for yourdomain.com and *.
- DNS only: everything else. Most of all the A and AAAA records for mail. Our email needs them to point straight to our mail server. Cloudflare's proxy only carries web traffic, not email.
- Also DNS only: the CNAME for site-eu1._domainkey. Receivers find your DKIM key through it.
- MX and TXT records are always DNS only at Cloudflare.
Do you use FTP or SSH? Then connect with the server name of your web hosting, like da005.site.eu. Not with your own domain name: the proxy doesn't pass FTP or SSH.
Switch to Cloudflare's nameservers
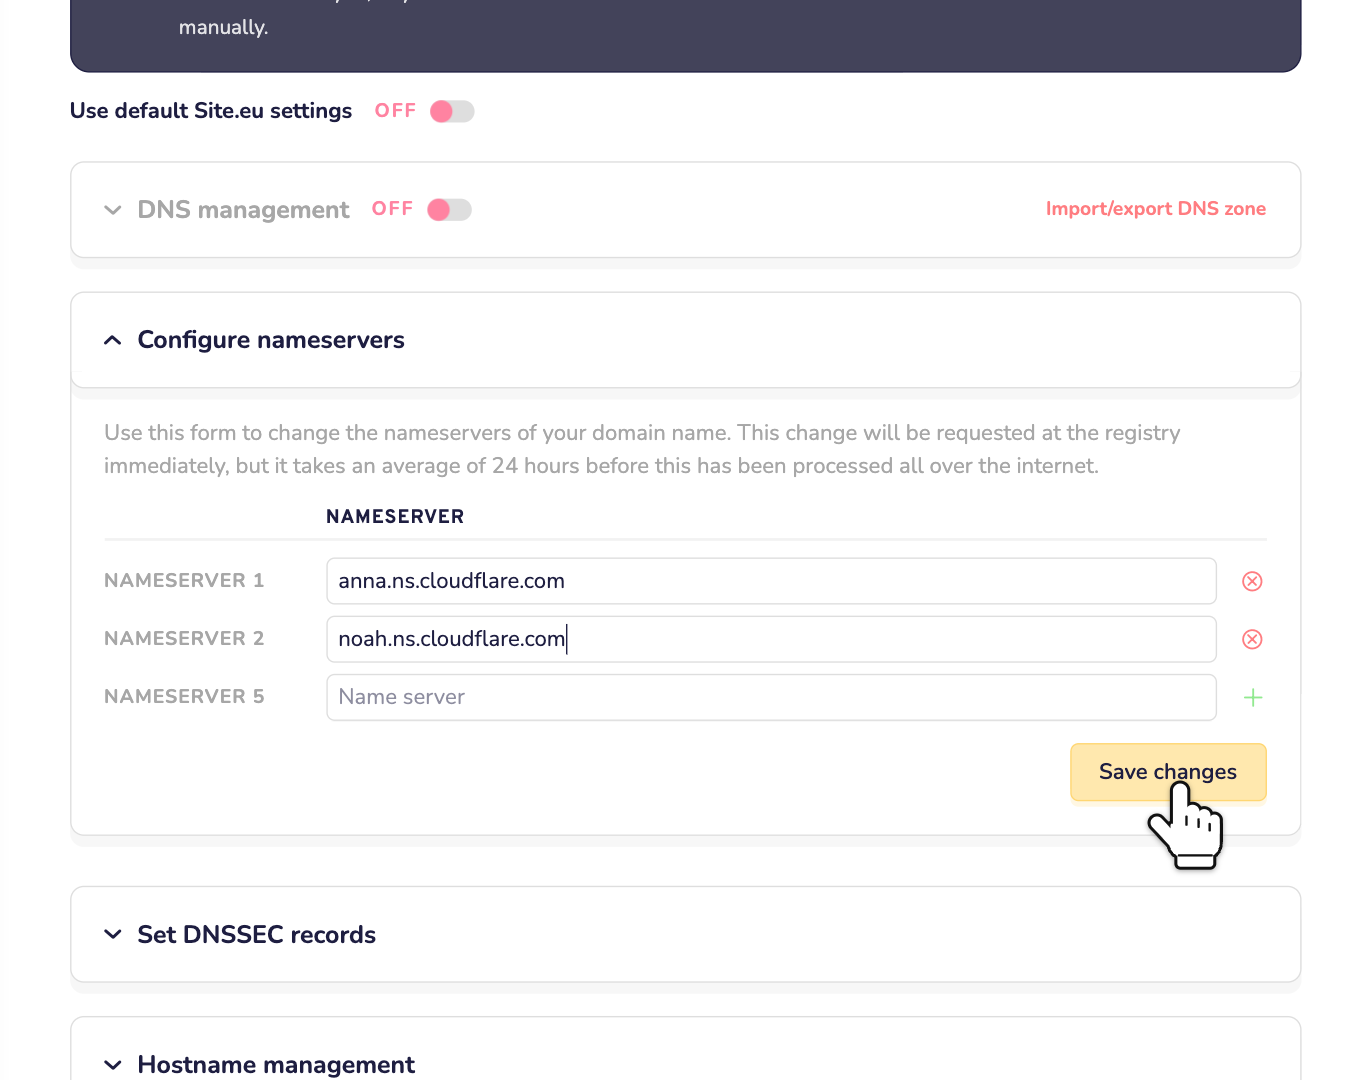
Cloudflare now shows you two nameservers. They look like anna.ns.cloudflare.com. Yours have other names. Copy them exactly.
Important: do steps 8 and 9 right after each other. When you turn off our DNS management, our nameservers stop answering for your domain name at once. Pick a quiet moment, too. Until the whole internet uses Cloudflare's nameservers, some visitors can't reach your website for a while.
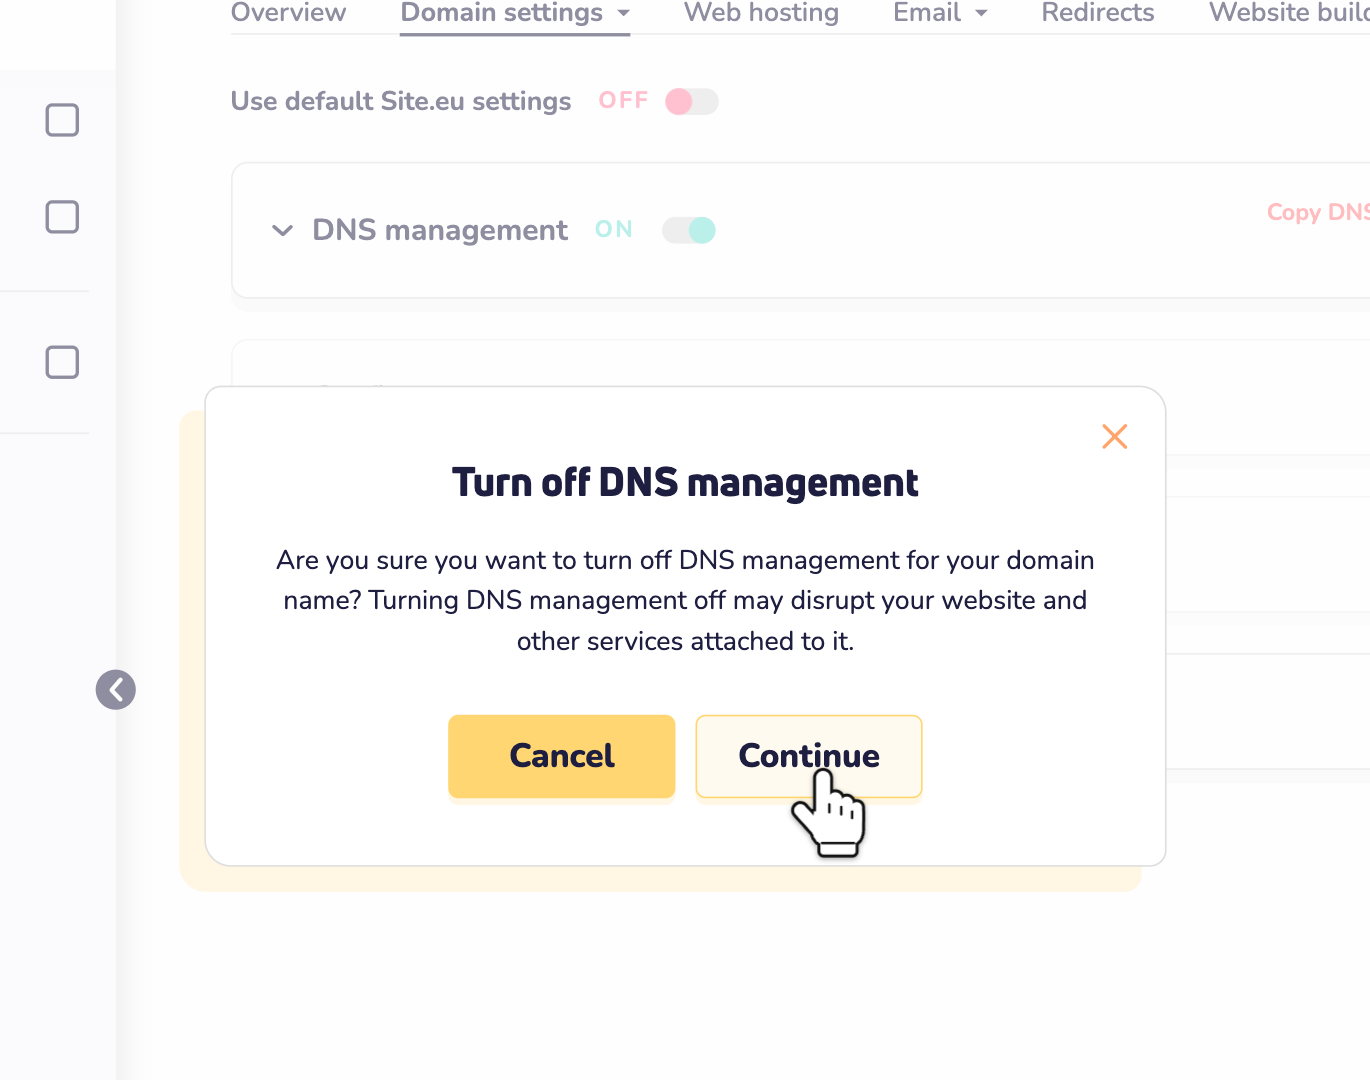
Step 8: Go back to Advanced settings. Turn off DNS management and click Continue.
Step 9: Open Configure nameservers. Enter Cloudflare's two nameservers. Remove the other rows with the red cross. Click Save changes.
The change can take up to 24 hours to work everywhere. Cloudflare sends you an email when your domain name is active there.
Set SSL to Full (strict)
Step 10: In Cloudflare, open SSL/TLS. Set the encryption mode to Full (strict). Is it on an automatic setting? Then choose the custom setting first.
With Full (strict), the connection is encrypted all the way: from your visitor to Cloudflare, and from Cloudflare to our server. Cloudflare also checks our SSL certificate.
- Don't choose Flexible. Then Cloudflare talks to our server without encryption. Does your website send visitors to https? Then they end up in an endless loop of redirects.
- Error 526? Then Cloudflare doesn't accept the certificate on our server. It's missing, expired, or doesn't cover that name. Check it in DirectAdmin.
Our certificate renews by itself every 3 months. For that, Let's Encrypt checks your website through Cloudflare. Do you use Cloudflare settings that block or challenge visitors? Then they can block that check too. Did a renewal fail? Set the A and AAAA records of your website to DNS only for a moment. Renew the certificate in DirectAdmin, and turn the proxy back on. Read why an SSL renewal can fail.
Turn DNSSEC back on, at Cloudflare
Step 11: Is your domain name active at Cloudflare? Then turn on DNSSEC there. Open the DNS settings of your domain name and click Enable DNSSEC. Cloudflare shows the values for your registrar. For your domain name, that's us.
Step 12: In your dashboard, go to Advanced settings and open Set DNSSEC records. Choose the algorithm ECDSA Curve P-256 with SHA-256 (13) and the flag KSK (257). Paste the public key from Cloudflare. Click Save changes.
The notice about missing DNS records
Your dashboard now shows a notice about missing DNS records. That's normal. We only check the records on our own nameservers. We can't see your records at Cloudflare, so the notice stays. Read more about DNS notifications when you manage your DNS elsewhere.
It's handy, though. Click Viewing missing DNS records. You see every record your services need, with the right values. Does Cloudflare have them all? Then you can ignore the notice.
Good to know
- Don't turn on Cloudflare Email Routing. It only works after you delete our MX records. Then email for your mailboxes stops arriving.
- Check your DNS. Our DNS check works with any nameservers, also Cloudflare's.
- Want our DNS back? Turn Use default Site.eu settings back on. We put our nameservers back, add the records again and take care of DNSSEC. First remove Cloudflare's keys under Set DNSSEC records, and wait 2 days.